Ad Blocker Detected
Our website is made possible by displaying online advertisements to our visitors. Please consider supporting us by disabling your ad blocker.
Maintaining ideal water quality requires a systematic approach to filter replacement, as neglect can compromise safety and system efficiency. By understanding key indicators like flow rate and water clarity, we can develop a precise schedule for timely interventions. Proper installation and regular inspections are critical components that prevent issues such as leaks or reduced filtration performance. To guarantee long-term reliability, it’s crucial to follow established guidelines—yet, many overlook these nuances, which makes mastering this process indispensable for sustained water safety.
Key Takeaways
- Monitor water quality and flow rate regularly to determine when filters need replacement.
- Gather necessary tools, turn off water supply, and carefully remove and replace the filter following manufacturer instructions.
- Ensure correct filter type and orientation, verifying compatibility and certifications for effective contaminant removal.
- Inspect for leaks and proper installation, then test water quality post-replacement to confirm filter effectiveness.
- Maintain a routine schedule, keep components clean and dry, and record replacement dates to prolong filter lifespan.
How to Determine When Your Water Filter Needs Replacing
Determining when to replace your water filter is essential for maintaining ideal water quality and filter efficiency. The filter lifespan varies depending on usage, water source, and filter type, but a decline in water quality often signals the need for replacement. Regularly monitoring the flow rate can provide insight; a noticeable decrease indicates clogging and diminished filtration capacity. Water taste, odor, and clarity are practical indicators—if they worsen, the filter is likely saturated with contaminants. Additionally, manufacturer guidelines specify recommended replacement intervals, which serve as a baseline. Relying solely on time can be inaccurate, so combining interval cues with water quality observations guarantees peak performance. Proper timing preserves filter efficacy, prevents system strain, and guarantees consistently safe, clean water.
Step-by-Step Guide to Replacing Your Water Filter
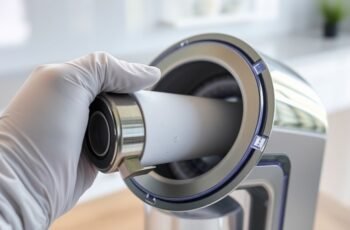
To replace your water filter effectively, we begin by assembling all necessary tools and guaranteeing the system is ready for maintenance. Next, we shut off the water supply to prevent leaks or pressure issues during installation. Finally, we carefully install the new filter, verifying proper placement and secure connections to ensure maximum performance.
Prepare Necessary Tools
Before beginning the filter replacement process, we gather all essential tools to guarantee a smooth and efficient procedure. Proper preparation ensures minimal disruption and maintains peak water quality. Key tools include a filter wrench, clean cloths, and a basin for catching residual water. Additionally, we incorporate cleaning routines and water quality testing devices to verify contaminant removal post-replacement. The following table summarizes the necessary tools:
| Tool | Purpose | Notes |
|---|---|---|
| Filter wrench | Remove and install filters | Use specific to your filter model |
| Clean cloths | Wipe and clean connections | Prevent leaks and debris accumulation |
| Basin | Catch water during replacement | Avoid messes |
| Water testing kit | Ensure water purity | Confirm cleaning effectiveness |
| Gloves | Maintain hygiene | Protect hands from contaminants |
This preparation guarantees accurate, safe, and effective water quality testing and routine maintenance.
Turn Off Water Supply
Since water flow can cause significant messes or damage if left uncontrolled, we must immediately shut off the main water supply before proceeding with the filter replacement. This step is vital to prevent water pressure from causing leaks or spills during disassembly. Turning off the supply ensures that water pressure drops to zero, facilitating safer handling of plumbing components. It’s important to think about water temperature; if the water is hot, wait for it to cool to avoid burns and to prevent damage to plastic fittings. Monitoring water pressure helps confirm the supply is fully shut off—low or no pressure indicates safety. Properly closing the main valve guarantees a controlled environment for removing the old filter and installing the new one without risking unnecessary water damage.
Install New Filter Properly
Proper installation of the new filter is essential to guarantee peak performance and prevent leaks. Confirming correct placement aligns with the filter’s designated orientation, which directly impacts its lifespan and filtration efficiency. We recommend verifying the replacement frequency specified by the manufacturer to avoid premature wear or clogging, which can compromise water quality. When installing, secure the filter firmly to prevent any gaps or loosening that could lead to leaks or reduced flow. Use an appropriate wrench if necessary, but avoid overtightening, as this can damage components. After installation, check for leaks and confirm water flow is steady. Properly installing the filter maintains its maximum lifespan, minimizes maintenance needs, and ensures the system consistently delivers safe, clean water.
Tips for Choosing the Right Replacement Filter for Your System
Selecting the appropriate replacement filter requires careful consideration of your system’s specifications and the contaminants you aim to remove. To guarantee maximum performance, evaluate the filter materials—activated carbon, ceramic, or reverse osmosis membranes—based on their effectiveness against specific impurities. Brand comparisons are essential; some brands prioritize filter longevity, while others focus on contaminant removal efficiency.
Choose filters based on your water needs, materials, and trusted brand standards for optimal performance and safety.
Key tips include:
- Match the filter material to your water quality needs.
- Review manufacturer specifications for compatibility.
- Compare brand reputations for durability and reliability.
- Consider certifications (NSF/ANSI standards) to verify contaminant removal claims.
A thorough assessment of these factors helps assure your system’s continued efficiency and safe, clean water.
Common Signs You Need to Change Your Water Filter Early
Regularly monitoring your water quality is essential because changes in taste, smell, or appearance often indicate that your filter is no longer functioning effectively. Early signs include a noticeable decline in water clarity, persistent odors, or an altered taste, all of which suggest the filter’s capacity to remove contaminants has diminished. Understanding these indicators helps optimize filter lifespan and maintain water quality. The table below clarifies key signs and their implications:
| Sign | Implication |
|---|---|
| Unusual taste or smell | Filter has reached or exceeded its effective lifespan |
| Cloudy or discolored water | Possible filter clogging or breakthrough |
| Reduced water flow | Filter media is clogged, reducing efficiency |
| Visible debris or particles | Filter needs replacement to restore quality |
How to Maintain Your Water Filter for Optimal Performance
To guarantee your water filter performs at its best, consistent maintenance is essential. Proper upkeep directly influences the filter lifespan and ideal replacement frequency, preventing premature failure.
- Regularly monitor water quality to detect declines in filtration efficiency, indicating it’s time for inspection or replacement.
- Follow manufacturer guidelines for cleaning, which can prolong filter lifespan without compromising performance.
- Keep track of usage volume; exceeding recommended gallons accelerates wear, necessitating more frequent replacements.
- Ensure proper installation and sealing to prevent bypass and maintain filtration integrity.
Troubleshooting Common Issues During Filter Replacement
When replacing a water filter, encountering issues is common, but identifying and addressing these problems promptly is vital for maintaining filtration efficiency. A key challenge involves understanding the filter lifespan, which directly impacts replacement frequency. If a filter is overdue for replacement, reduced flow rate or diminished water quality may occur, signaling potential clogging or microbial growth. Conversely, premature replacement can lead to unnecessary costs without improving water quality. Troubleshooting often involves inspecting for leaks, ensuring proper seating, and verifying compatibility with the filtration system. It’s important to adhere to manufacturer guidelines for replacement intervals, as exceeding recommended lifespan compromises filtration performance. Addressing these issues systematically ensures peak filtration, prolongs filter life, and maintains water purity.
Frequently Asked Questions
Can I Use a Different Brand of Filter Than Recommended?
We recommend sticking to the suggested brand due to brand compatibility and filter cross compatibility issues. Using a different brand may risk inefficient filtration or damage, so it’s best to follow manufacturer guidelines for peak performance and safety.
How Often Should I Sanitize My Water Filter System?
We recommend sanitizing our water filter system every 3 to 6 months to prevent buildup and guarantee ideal performance. Adhering to a strict sanitation schedule is essential for effective filter maintenance and maintaining safe, clean water quality.
Are There Filters Suitable for Removing Specific Contaminants?
Yes, certain filters are designed to target specific contaminant types, and it’s essential to verify filter compatibility with these contaminants. We analyze your water composition to recommend the most effective filtration system tailored to remove particular contaminants efficiently.
What Is the Average Lifespan of a Water Filter?
We believe the average filter lifespan varies, typically between 6 to 12 months, depending on usage and water quality. Regularly monitoring filter performance and following recommended replacement timing guarantees peak filtration efficiency and contaminant removal.
Can I Install a Water Filter System Myself Without Professional Help?
We believe DIY installation is feasible if you understand the process and have essential tool requirements, such as wrenches and tubing cutters. We recommend following detailed instructions and exercising caution to guarantee a secure, leak-free setup without professional help.
Conclusion
Regularly replacing your water filter is essential for maintaining peak water quality and system efficiency. Studies show that up to 60% of household water issues stem from neglected filter maintenance. By monitoring flow rates and signs like changes in taste or odor, we can guarantee safe, clean water. Adhering to proper replacement protocols not only prolongs filter lifespan but also safeguards health, demonstrating that proactive maintenance is a key, data-driven approach to reliable water filtration.